Representing a workflow
November 2, 2026 Leave a comment
In the previous post we looked at how we can use AI to help generate sample resource graphs to represent specific scenarios in a conversational manner by supplying the scenario as an initial prompt, then examining the response from the AI (both manually and using a FHIR validator) and requesting changes. The intended purpose being as a training tool for people learning FHIR, and also as a ‘quick start’ for designers.
This works well (I think) when there is a single specific scenario – for example modelling a clinical interaction, but falls short when considering a workflow like the steps involved when ordering a laboratory test, making a referral or creating a prescription. In this post we’ll consider how we can extend the functionality to model the multiple steps within a workflow.
Let’s start by reviewing how FHIR resources are used when representing workflow. If you take a look at the workflow page in the spec you’ll see the following image:

It describes the 3 different kinds of workflow resources and their usage patterns:
- The Request pattern shows the common elements for resources that represent a request for something – like MedicationRequest or the generic ServiceRequest
- The Event pattern represents the ‘outcome’ of the request – something that has happened like an Observation or MedicationDispense. The event doesn’t need to be matched to a request – though it often will be.
- The Definition pattern that represents a plan for something like PlanDefinition and ActivityDefinitions (and a Questionnaire – think of it as a plan for a form)
To keep things manageable, we’ll focus on the request and event sides of the workflow – i.e. what a request might look like and how the events (or responses) can be modelled – and ignore (for now) the plan / definitional aspect. In other words we – the authors – will decide the steps & events involved in the workflow rather than following some pre-determined plan. We’ll often use the generic term ‘step’ to represent either a request or an event.
The workflow will be a simple sequence of steps. If you were modelling a more complex workflow where the steps could vary according to some criteria – eg a specific test may need to be performed by a hospital then you’d need a separate workflow for each ‘flow’ through the workflow. (This is something we may address in later versions of the app)
Refer to the FHIR spec for more detail on workflow.
To model a workflow we’ll follow this process.
- Create a new workflow
- Add a step – a request or an event
- Ask the AI to generate a suitable resource graph for the step
- Examine that graph and suggest changes or updates as required
- Add a new step and continue the process until complete
Each step in the workflow will have a separate bundle of resources – some that are new to that step and some where a resource from a previous step has been updated. The classic example of changing a resource would be something like a ServiceRequest or Task where the status changes as the workflow progresses. In general we won’t remove resources – though there’s no reason why we can’t if that is appropriate.
What this does mean is that the bundle from the previous step needs to be supplied as input to the next one (kinda obvious when you think about it) while the original remains unchanged. So although we can specify the steps in one go, we really need to complete each one in sequence – or at least the parts that ‘feed into’ the next step.
Let’s walk through a simple scenario. A primary care practitioner generates a prescription, which is fulfilled by a pharmacist.
(Note that in some of the screenshots below the left pane refers just to Events – the ‘Requests’ was added later to better indicate that both request and event resources are being generated.)
Load the clinFHIR Patient Viewer and click the Workflow button. This is the screen – assuming you’ve not loaded the assistant before. If you have, then your most recent conversation will be shown.

At the top of the screen you will see the Mode options – Single conversation and Workflow. Click the Workflow button.

To add a workflow click the ‘plus’ icon at the right side of the screen. The following dialog is displayed.

You can create a new workflow or upload one that was previously exported. For now we’ll create a new one.
Enter the title and description of the new workflow and click the ‘Save workflow’ button that appears to the upper right when a title is entered. The new workflow is created, added to the list and displayed in the app.

Now we see the Home screen when a workflow has been created – but before any steps (Requests or Events) have been added. The steps will be displayed to the left, and the details of each step will be shown on the right when we select it. We can return to this screen at any time by clicking the Home button.
Next, add a couple of steps by clicking the ‘Add new request or event’ link at the lower left. We only have 2 steps in this simple workflow – make prescription and dispense medication.
In the following screenshot we see the details for the ‘Dispense medication’ step. Note that we’re about to select the Base Bundle as being the bundle from the ‘Generate prescription’ step. This ensures that the key resources from the first event (in particular the ServiceRequest that represents the prescription order) are available to this step. We’re expecting that the dispense mediation event will update the status.

Now let’s create the first step – the consultation.

You can see that it took a few goes to get the result I wanted. A more capable model such as sonnet or opus may have done this in a single go, but Haiku gets there in the end. To view the bundle you can click ‘Load this bundle’ which will load it into the Patient Viewer, or just click the ‘latest bundle’ tab as shown here. If you want to see the contents of a resource you can also see a tab with a list of the resources in the bundle.

(You can also see that when there are 2 or more events you have the ability to move the events around. Not needed here, but useful when the workflow is more complex.)
At this stage we can continue to refine the bundle if we want – perhaps adding more details of the conversation. But for now, let’s proceed to the next step – the medication dispense.

Because we specified the base bundle to come from the ‘Generate prescription’ step, you can see a notification just below the prompt. This only appears on the first prompt in the conversation – after that the conversation uses the bundle it creates. The following text is automatically added to the prompt to ensure that the AI updates the existing resource (from the base bundle) rather than creating a new one. This is important when we want to look at changes to resources between steps – such as the ‘status’ element on resources like ServiceRequest or MedicationRequest.
If there is a need to change an existing resource, for example if the status of a workflow resource like ServiceRequest or MedicationRequest needs to change, then be sure to alter the existing resource and retain the id rather than creating a new one.
Here’s how my conversation went:

As you can see, I needed to give it a hint that the MedicationRequest status needed to be updated.
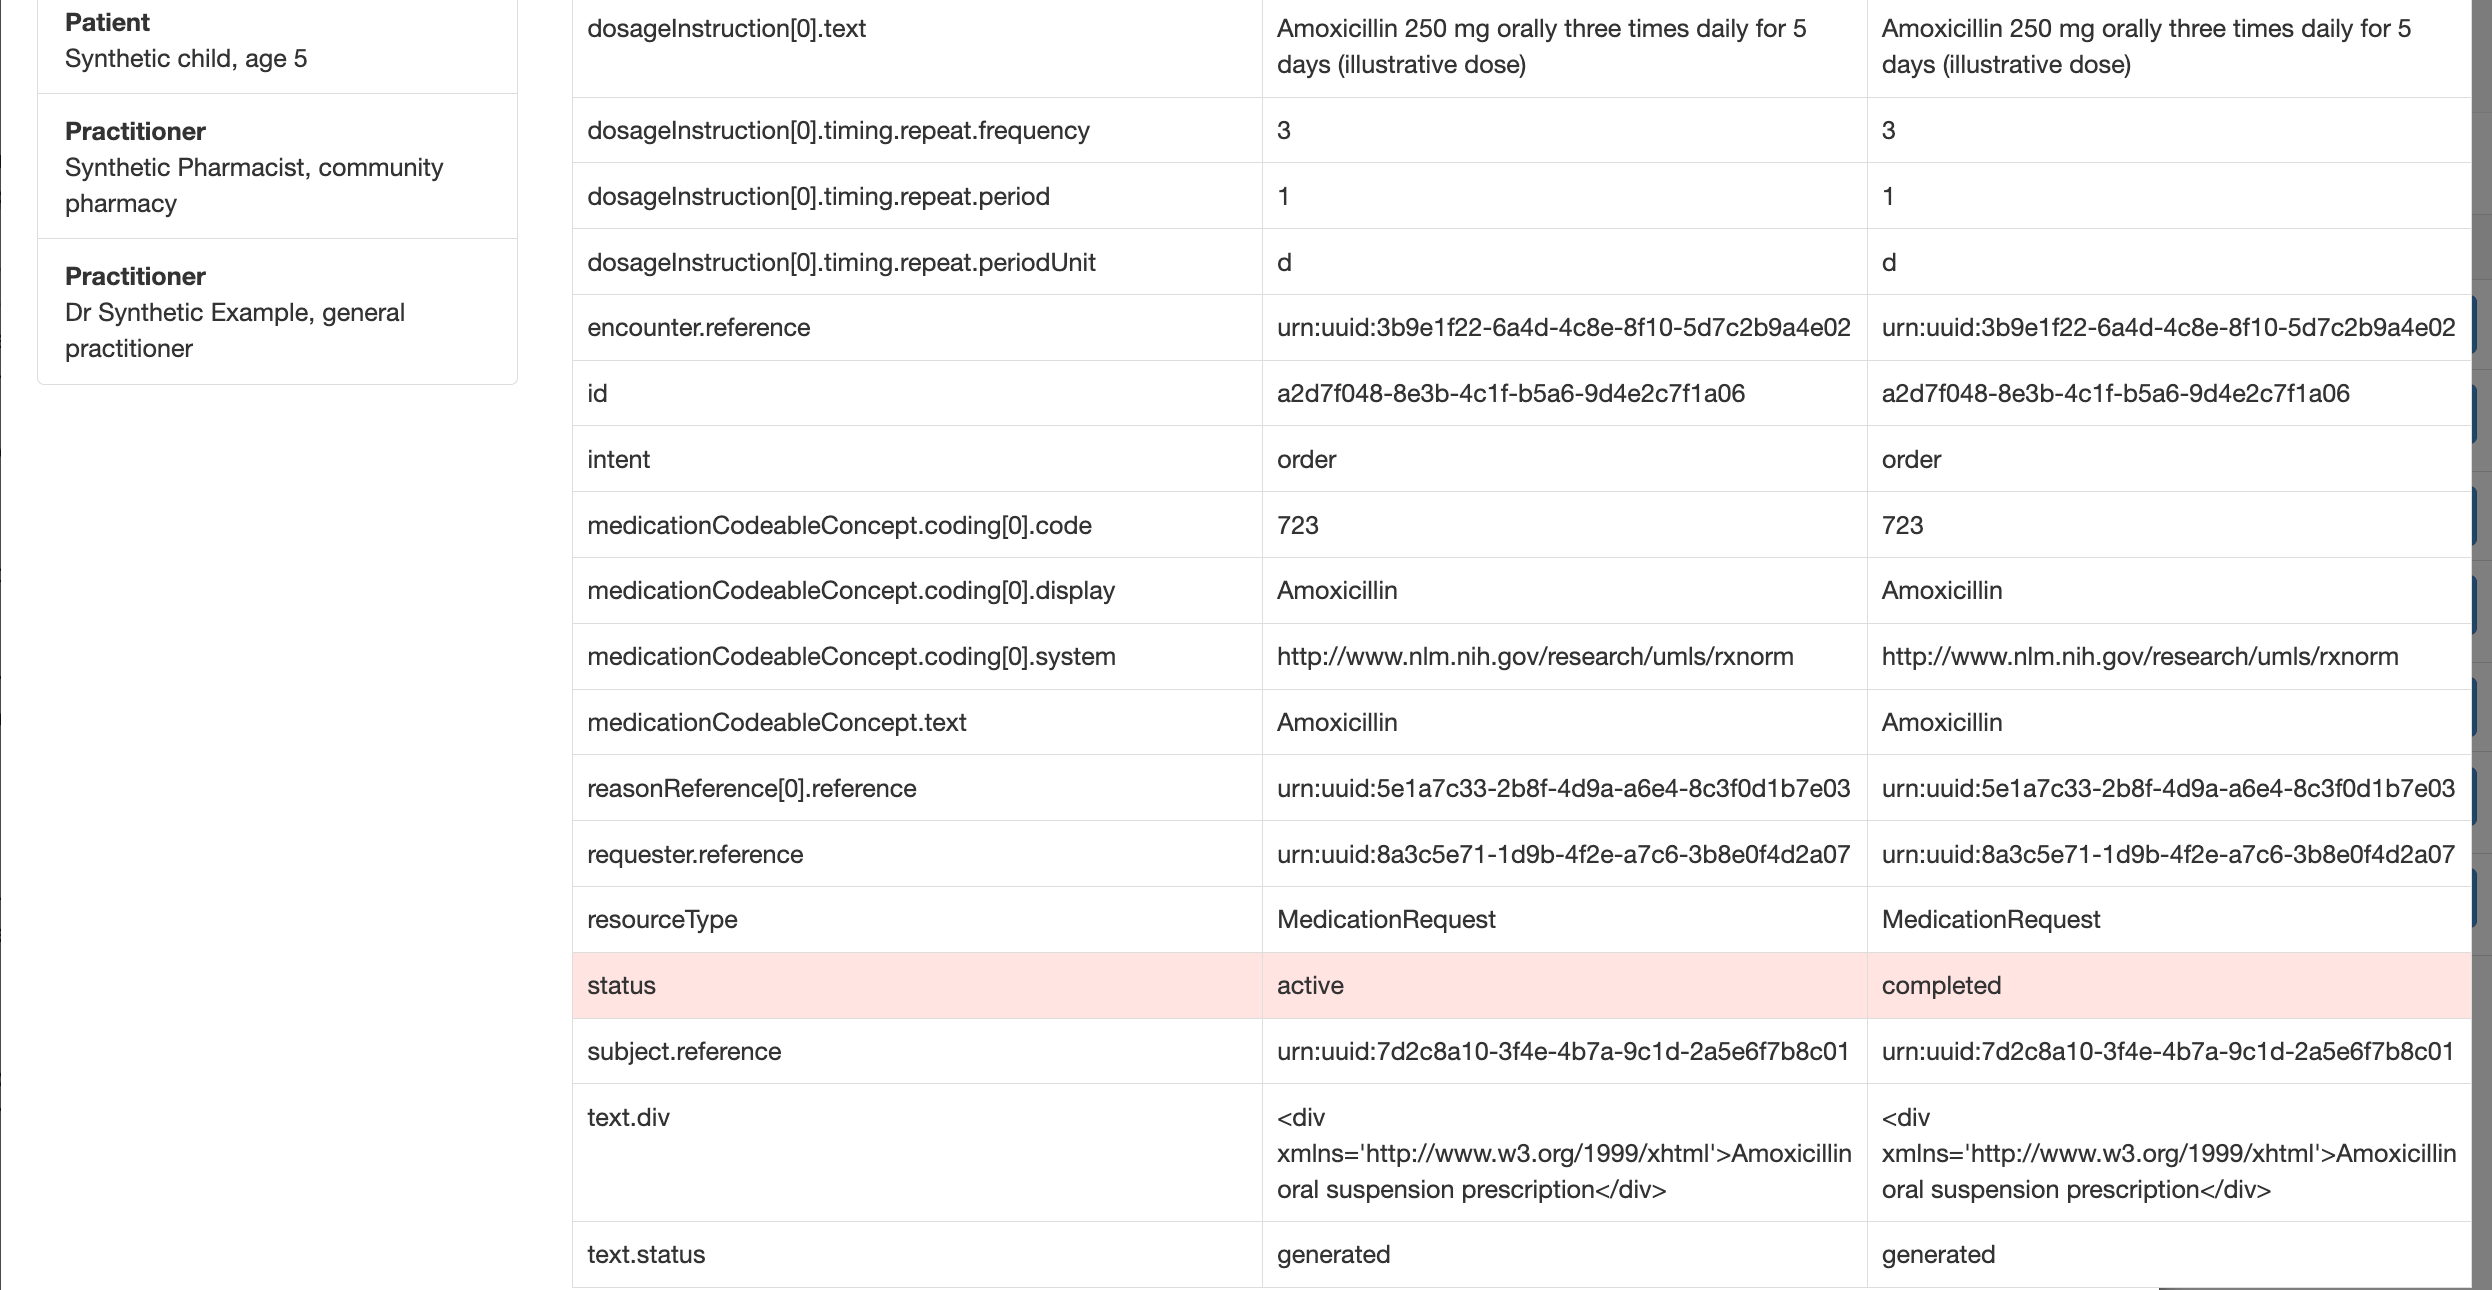
To see what changes have been made, use the resource history icon as shown in the next screen shot. All of the icons have popovers describing their function (they are not always as self descriptive as I’d like).

The following screenshot shows how the MedicationRequest status has changed from ‘active’ to ‘completed’.
To go back to the main editing page click the Home button.
So that’s how we can represent workflow in clinFHIR using an AI helper to build the bundles. Note that it still helps to have some understanding of FHIR – and, of course, that’s one of the main purposes of clinFHIR.
Please post any comments or questions in the FHIR chat.
 About David Hay
Recent Comments